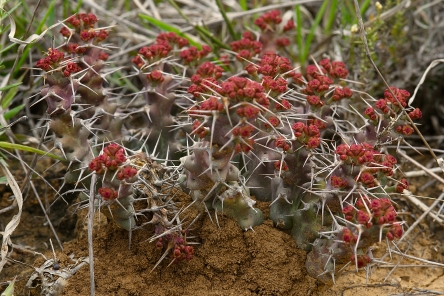
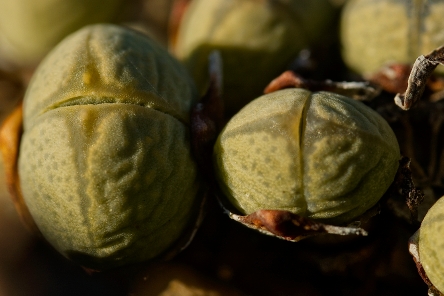
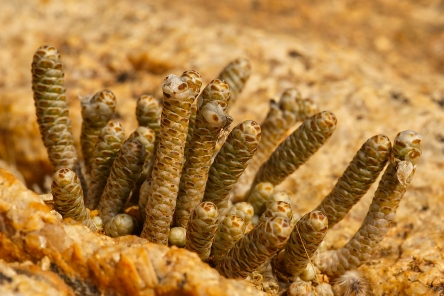
Photographed just north of Garcia Pass 13th Sept. 2011.
Look at the beautiful colour of the fruits. Most of the plants is underground.

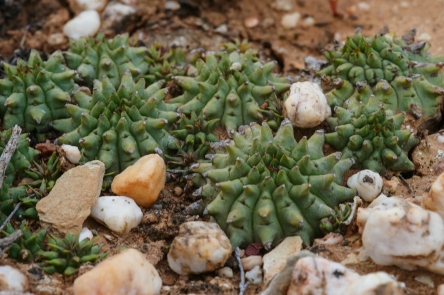
Photographed just north of Garcia Pass 13th Sept. 2011.
Look at the beautiful colour of the fruits. Most of the plants is underground.
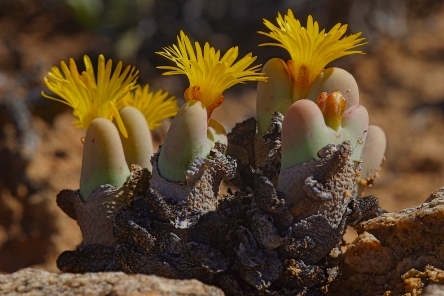
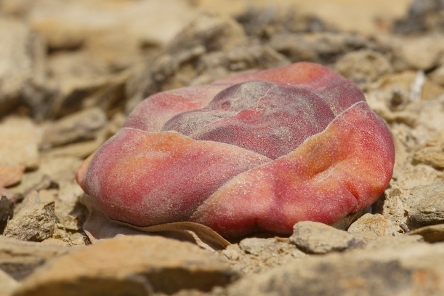
Conophytum bilobum ssp. bilobum, 1st April 2012.
Look at the reptile-like remains of old leaves in the first picture.
Like other names, a plant name is nothing more than a label, a way to refer to something or somebody, and to distinguish them from others.
Normally the name also gives you some extra information, but it is often unclear whether this is helpful or not. Let’s look at a few examples of this.
When you know that the Latin word pumilus means dwarf and you see that word as part of a plant name, you will expect that plant to be small, right? Well, yes …usually. There is a small plant in the Mesemb family called Antimima pumila. This is indeed a small plant, but so are most other Antimimas. The name only makes sense when you know that the plant used to belong in the genus Ruschia, where most plants are a lot bigger.
There are worse cases however. While on the topic of small members of a group, what about Haworthia minima and H. pumila? They must be among the smallest of Haworthias, one would think. But no, they are about the biggest. Very confusing, until you find out that these species first were considered to be Aloes and as such they were dwarfs of course.
Haw. pumila
There are many more examples of peculiar and confusing names, often as the result of transferring species from one genus to the other. What about Glottiphyllum linguiforme?
Glottis is Greek for tongue, phyllum comes from the same language and means leaf; lingua is Latin for tongue and forme means what you think it means. As long as the species was part of the super genus Mesembryanthemum the name was nice and descriptive, but nowadays it is more funny than anything else.
A similar case is Gibbaeum gibbosum, where both parts of the name refer to the Latin word for hump (gibba).
In several cases plants get their names from the geographical area where they were first found (Fockea capensis, Pachypodium namaquanum,) but is is a bit of an awkward practice. Sometimes the plant is later found to have a much wider distribution then thought at first (Aloe angolensis also occurs in Botswana, Namibia and Zambia, Avonia rhodesica is found not only in Zimbabwe- the former Southern Rhodesia- but also in South Africa and Botswana; etc.). The type material of Aloe littoralis was collected from a coastal area (near Luanda, Angola) and takes its name from that habitat. The distribution is now known to stretch right across the continent, so the name is rather misleading.
Avonia albissima is by no means the whitest species in the genus as the name implies.
Crassula columnaris is usually anything but columnar.
A lot of plants have been named after people. Often this is the person who first found it (Tylecodon nolteei, Caralluma denboefii), which makes some sense, but sometimes the connection between plant and person is less obvious.
I remember the story of the Dutch horticulturalist J. A. Janse who was writing a book on succulents plants named after persons. Many of these names are of course well known, but after sifting through the literature he ended with a list of names that did not mean a thing to him.
One of the authors he approached for information was a distinguished French botanist who had described a couple of Kalanchoes from Madagascar.
After some time the botanist’s widow sent him a rather tart reply to his letter, in which she informed him that her husband has recently died and that the reason why nothing was known about these names, was that the ladies to which they referred had nothing to do with their namesakes, apart from the fact that at some stage they had been been her husband’s mistress.
The above should not lure you into thinking that the naming of plants is not a serious matter. It is, but to my mind a somewhat light-hearted approach to things can often make them just that little bit more interesting.
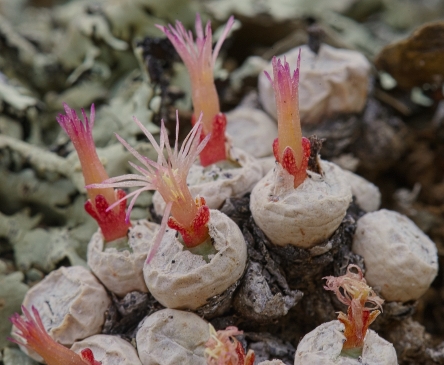
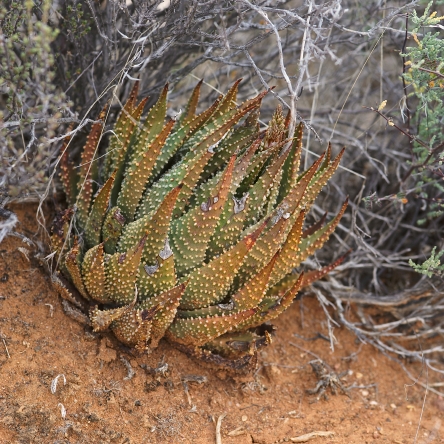
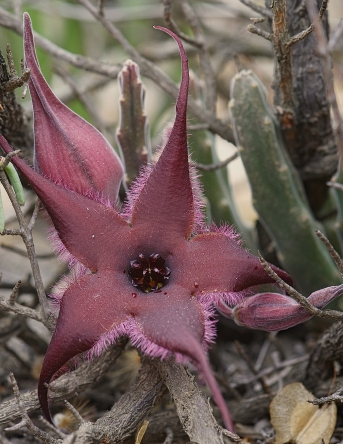
Photographed at noon on 20th April 2012 near the eastern entrance to Aneysberg Nature Reserve.
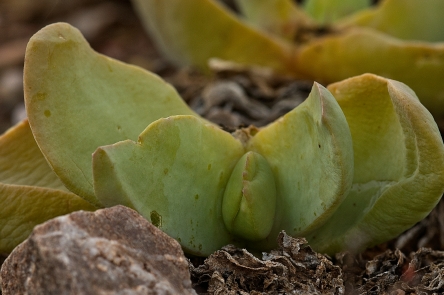
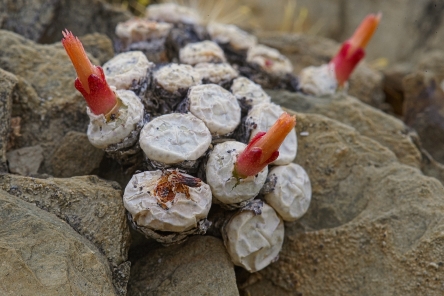
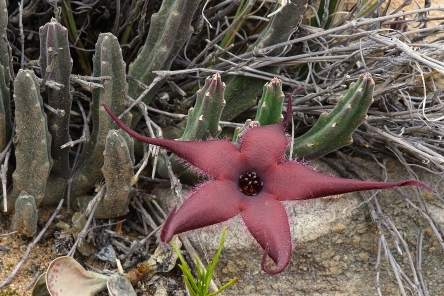
These two pictures were taken along the road from Ladismith to Laingsburg on 21st April 2012.
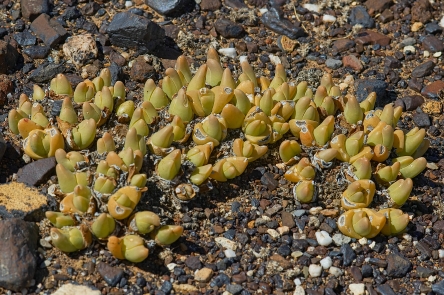
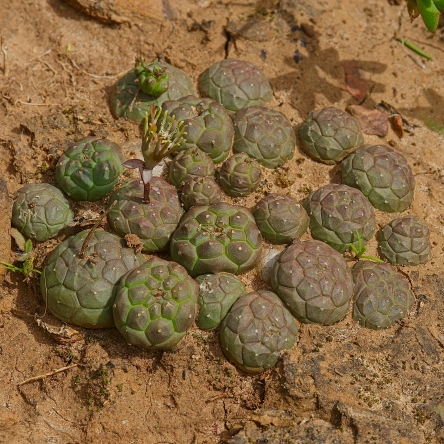
When I first saw these little beauties on a hillside on the outskirts of Calitzdorp I had no idea what they could be, but after some searching in my library I found the original description of the species by Ernst van Jaarsveld in Bradleya 1994. Although it has since been found in a few other places and is now known to occur from Calitzdorp in the west to De Rust in the east it is considered critically rare. It grows in the shade of shrubs and often forms dense clumps. The photograph was taken in the first week of May last year.

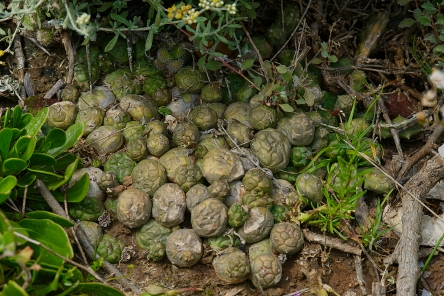
Near Uitenhage, Eastern Cape, 26th October 2012
One of the first things I usually do after starting up my computer in the morning, is checking which new observations there are on the site of iSpot Southern Africa. If you are interested in the flora and fauna of this part of the world, it is well worth having a look at this site ( http://www.ispot.org.za/ ). The quality of the pictures people upload to it is quite diverse, sometimes to a point where it is difficult to even recognize the subject. This is not to say that this site is worse than many others in this respect, it is just that I am so often confronted with the results here.
Judging from the way most people photograph, I strongly believe they do not spend enough time on taking their pictures. Maybe I’m just getting a miserable old git, but I think that it is a waste of time to take pictures when the results become a kind of hit-and-miss thing. Believe me, I’ve been there, done that. Nowadays I’d rather spend 5 minutes on taking one or two worthwhile pictures than 1 minute on taking a whole lot of useless ones. Your mileage may vary of course and I would be interested to hear from you if you have another opinion.
For a bit of more specific advice I refer you to the following text, which is a slightly adapted paragraph from my book on plant photography.
Too many elements in the picture, so that the viewer has to guess what you want to convey.
This cannot usually be remedied afterwards; in some cases cropping the picture help.
For future shots try the following :
1 Get closer.
2 Change angle of view to get different background.
3 Use greater focal length.
Subject not standing out
If there is too little contrast (in colour and/or light) between subject and background, the problem can sometimes be solved in post-production.
If the background is too much in focus there is no way you can improve this picture.
In the future pay extra attention to the background and squint your eyes at the scene to judge the light conditions, before you press the shutter.
Distracting elements in background
This probably means that the Depth of Field (see definition below) is too much.
In certain cases post- production may solve (part of) the problem.
In the future use a shallower DoF (check the scene with the DoF preview button) and/or block distracting elements (esp. bright patches).
Spend more time studying what is in the picture frame.
Depth of field (DoF)
This is the distance over which objects remain acceptably sharp in front of and behind the point on which the lens is focused.
In simple terms: DoF is the part of the scene that appears acceptably sharp in a photograph.
DoF is determined by 3 factors: the focal length, the aperture and the distance between camera and subject.
It decreases as the focal length of the lens becomes greater, the aperture is made bigger and the distance between camera and subject is diminished.
Subject too small in picture space
The picture is taken from too far away or with too short a focal length.
Cropping the picture may offer a solution.
For future shots move in closer or use a longer lens.
Wrong DoF
This means that there is either too much or too little of it, or that it is in the wrong place.
None of these issues can be remedied in an existing picture.
For future shots you should pay more attention to using the right aperture and/or spend more time on focussing properly.
Wrong background (too light or too dark; wrong colour; too cluttered)
Like with so many other problems, the scene was not screened well enough.
Only the first two issues may be improved in post-production (if you are lucky).
Next time spend more time studying the subject before pressing the shutter.
Flare
Light hitting the lens or a filter in front of it is the cause here.
There is no remedy for an existing picture.
For future shots use a lens cap or something else (such as a hand or a hat) to shade the lens.
In some cases flare may add a certain quality to the picture, so instead of avoiding it you may also try to put it to good use.
Main subject too dark or too bright
This occurs when the contrast in brightness between subject and background is too big.
It may be corrected (partly) in post- production.
To avoid this problem next time, use a smaller aperture for a light subject against a dark background and vice versa.
Picture blurred
Unfortunately there is no remedy for this issue.
When the whole picture looks fuzzy, this is caused by camera movement. Avoid this next time by using a tripod and possibly also a cable release or a self-timer delay.
When only part of the shot is blurred, the probable cause is wind. This can be prevented by using a shorter shutter speed.
Contrast in picture too high
When the difference between light and dark elements is too big for the sensor to cope with, this will be the result.
It may be corrected (partly) in post- production.
With smallish subjects, use of a diffuser and/or reflector may avoid this problem. Flash might also help.
Parts of subject damaged, discoloured etc
This happens amazingly often when not enough attention is paid to the subject matter.
In some cases the offending parts may be cropped out, but it is much better to look for unblemished subject matter next time. Continue reading Troubleshooting common mistakes and problems in plant photography
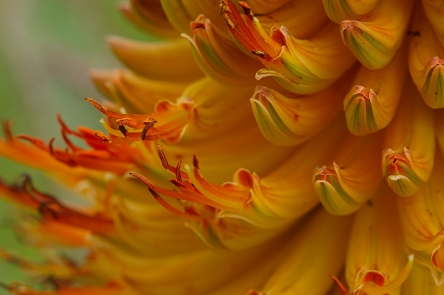
Although the species name suggests a wide distribution, A. africana occurs only in a rather limited area in the Eastern Cape. The gracefully upcurved flowers set it apart from similar species.
Pictures taken between Bedford and Grahamstown on 27th October 2012