Miniature succulents; masters of survival. Part 1

A few months ago I mentioned an article that I had written for “Veld & Flora” . Now that this has been published, I will share it with you here  in a slightly modified version.

***

Succulent plants come in all shapes and sizes. Some of them, like baobabs and certain cacti, are enormous, able to store great quantities of water. At the other end of the scale, we find the results of a trend towards reduction that can be seen in several unrelated families such as Aizoaceae, Asphodelaceae, Asteraceae, Crassulaceae, Euphorbiaceae and Portulacaceae. These miniature succulents are both small and compact, not taller than a few centimeters, often little branched, without visible internodes and with more or less spherical leaves or stem(s). (In case you don’t know: an internode is the part of a stem between the points where leaves or branches develop).

Sometimes the trend involves neoteny. This is a situation in which plants or animals retain juvenile or embryonic characteristics throughout their life span, but nevertheless are able to reproduce. (A famous case in the animal kingdom is the Mexican axolotl).

oophDSC_0124_lzn-1res
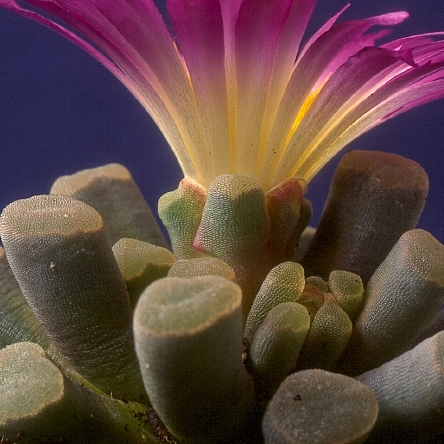
An interesting example in plants is the genus Oophytum, which only occurs on the Knersvlakte. It is a member of the Mitrophyllum group that only produces juvenile leaves. In effect, they are therefore perpetual seedlings.

Among succulent plant enthusiasts, miniatures are long-time favorites. This is hardly surprising, because even a small space can harbour a nice collection of them. There’s also an amazing abundance of shapes and colours, so that even without flowers there is always something to marvel over.
Last but not least, there’s great variety in their survival needs. In other words, both beginners and advanced growers will be able to find plants that fit their knowledge and ability. To grow some of these plants from seed to maturity is quite a feat, whereas others are much more amenable.
Even if you are not interested in keeping plants in captivity, there are many reasons for having a closer look at these dwarfs. In this article, we will focus on the way they cope with the challenges of their environment and make use of its opportunities.
Being small has both advantages and disadvantages, some of them evident, others much less so. Often the situation is rather complex. The solution for a problem may create a new problem, which in some cases is then (partly) remedied by another solution. Trying to understand this balancing act is an interesting exercise.
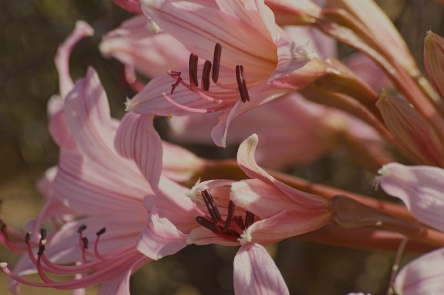
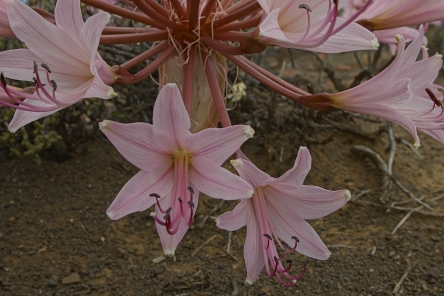
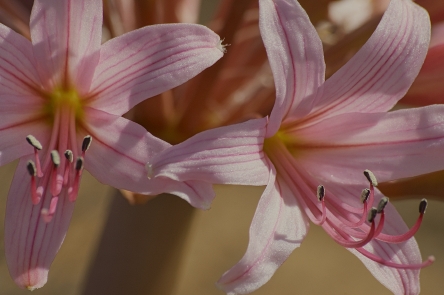
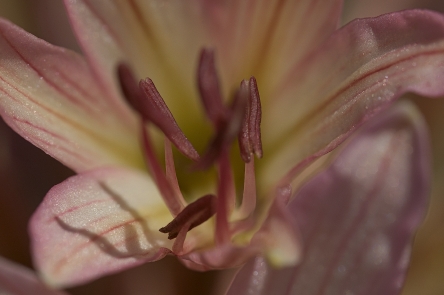
The accompanying pictures will hopefully convince you that these plants are not just interesting; they are also beautiful and visually stimulating.
The most obvious advantage of being small is that you need only little water, food and space to thrive. (Of course, the opposite is also true: when there is an abundance of these necessities, small succulents cannot compete with faster growing plants).
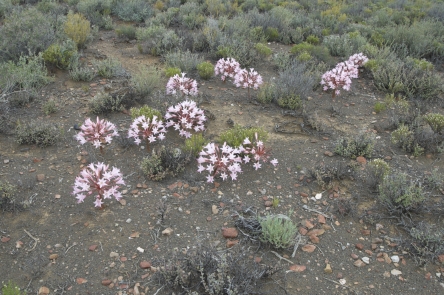
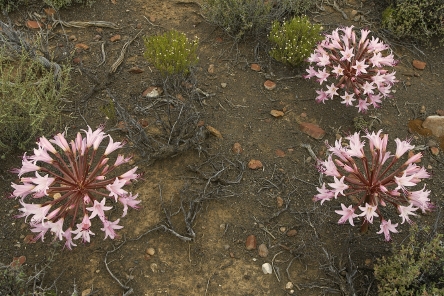
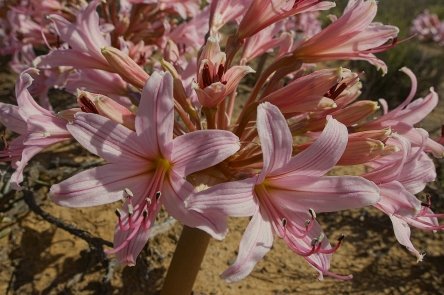
Because dwarf succulents can store only small amounts of water at a time, their storage organs have to be refilled at regular intervals, so the supply should be dependable. For that reason, the great majority of them occur in the Succulent Karoo, especially in Namaqualand with its predictable winter rainfall supplemented by even more reliable fog and dew.

argydela2012-03-31#006_lznres
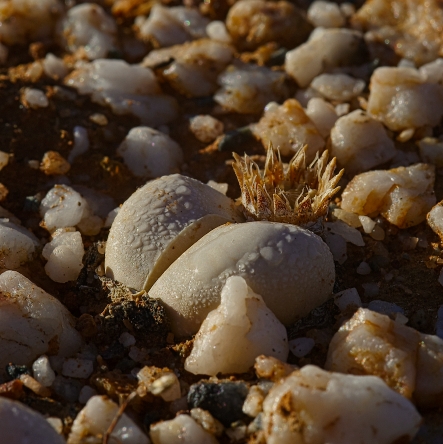
The hygroscopic fruit of this Argyroderma delaetii is still open early in the morning, as a result of the heavy nightly dew

The Succulent Karoo is not the only winter-rainfall desert in the world. Others are the southern Atacama Desert in Chile, the northwestern part of Baja California and the southern coast of Morocco. The first two especially, support a lot of succulents, but few if any of these are miniatures. In that sense, one could say that these little gems are a Southern African “invention”
The Succulent Karoo contains the richest concentration of succulents in the world. Whereas only about 140 species of stem succulents grow here, there are about 1700 species of leaf succulents, about 700 of which are small and compact. During the growing season, which is not just moist but also cool, these miniatures profit from the warmth of the soil.

fritpulcScan123_lznres
One of the few miniature succulents occurring outside the Succulent Karoo is this beautiful Frithia pulchra from Gauteng

euphpsglob2009-06-06_DSC2075_lznres
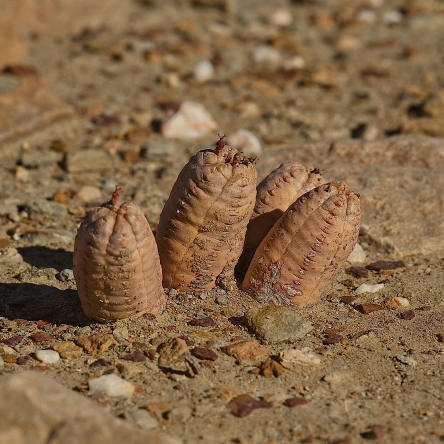
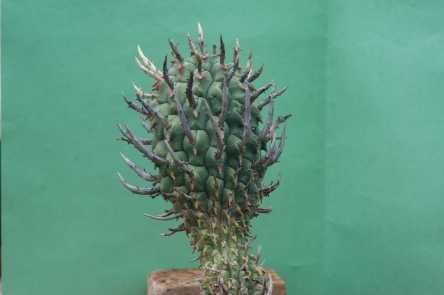
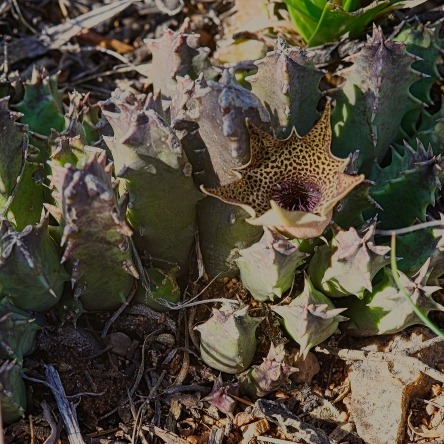
Not many stem succulents qualify as a miniature, but this Euphorbia pseudoglobosa from the Little Karoo certainly does

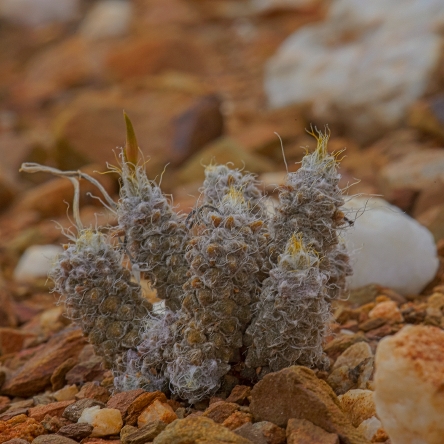
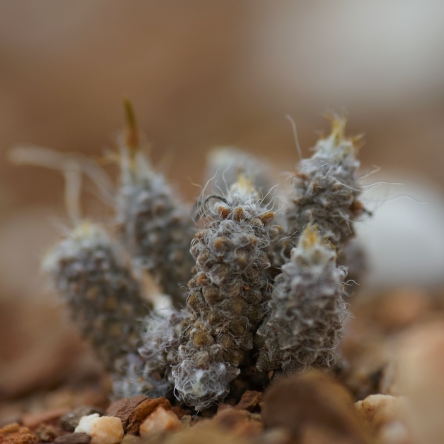
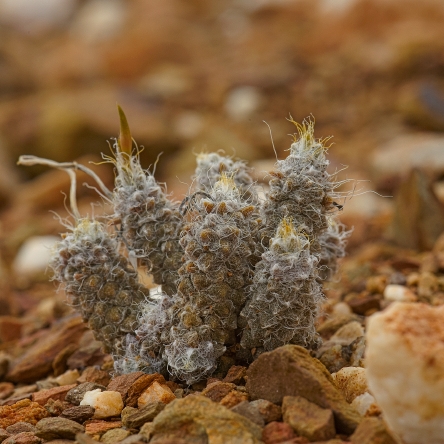
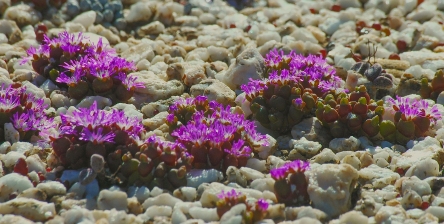
Small succulents are often restricted to places where water easily runs off, like gravel plains and quartz fields. Between and under rocks and stones, rainwater is often collected, providing moisture for small plants. In addition, dew and mist condenses on rocks and the moisture accumulates at their bases and in crevices. (Apart from water, this kind of habitat often also provides shade and protection from predators).

conopellupel2012-04-03#103_lznres
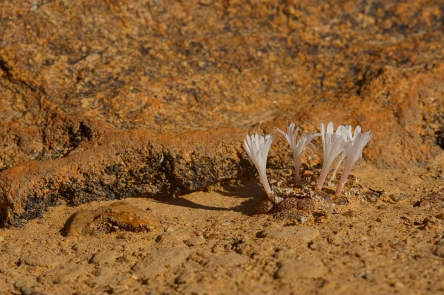
This Conophytum pellucidum, photographed near Kamieskroon, looks quite happy with the little bit of extra water that collects at the foot of a rock slab

To be continued.

The role of the background in plant photography; always important, often neglected

One of the things that people often do not realise when they take plant pictures, is how important the background is. As a result of this, the presence of a sub-optimal or downright bad background is  one of the most common mistakes in plant photography.
The significance of a suitable background can hardly be overrated. If you don’t believe me, just look critically at a collection of plant pictures and be (unpleasantly) surprised. On the other hand, a fitting background can do wonders for a picture.

When taking plant pictures outdoors, you should look carefully for distracting objects like branches, grasses, stones etc. in the background. You may have to remove these, but do not forget to replace dead leaves, branches etc. that hide or protect the plant when you are finished. When photographing plants in their habitat, it is usually best to have the background at least slightly out of focus. That is of course, unless you have a good reason to show the plant’s environment.
In photos of cultivated plants we often see labels and rims of pots that ruin an otherwise nice picture. This can often easily be avoided by taking the plant and/or the label out of the pot. When you use artificial backgrounds at home or in the greenhouse, it is a good idea to prepare a couple of them by making prints of out-of-focus photos of leaves, or anything else that looks suitable. For many subjects, a background the size of an A4 sheet will be big enough. Experiment with various backgrounds to see which gives the best results.

Plants or flowers which have light or hairy edges -or are light coloured in general- show up best against a dark background. In the field this can sometimes be arranged by casting a shadow with the help of another person, a camera bag etc. You may also be able to choose a different viewpoint that gives you a dark(er) background. Remember that warm and bright (“dominating”) colours usually are not very effective as a background because they seem to come forward, giving the photo an unbalanced feeling. Even small patches of these colours will draw attention away from the subject.

We tend to see what we expect to see. When we use a dark backdrop behind a light subject, we automatically assume this to result in a nice contrast in the picture.
However, if the dark background is hit by strong light, it will show much lighter in the photo than expected, so that the end result will be far different from what you intended it to be.

Your choice of lens will influence how much background will be visible, so when you have an unsatisfying background (wrong colour, bright spots, unwanted objects), you can often solve this problem by using a longer focal length. Getting closer to the subject might also help.
Your choice of aperture will influence the depth of field (DoF) and thereby the way the background will appear in the final picture. For a variety of reasons we normally use a small aperture in close-up photography. Unfortunately, this often leads to unexpected and undesirable results.
What happens? You look in your viewfinder or at your LCD screen and compose your photo according to what you see there. The moment you press the shutter button, the aperture closes down to the value you have chosen. The smaller the shooting aperture is, the more things inside the photo frame that were blurred (or even invisible) at first, will now come more or less into focus. Especially bright spots that were invisible will come to the fore. This may easily cause havoc to your nicely composed photo.
If your camera has a DoF preview button, you can more or less avoid this problem by pressing the button and looking in the viewfinder to try and see what happens. Unfortunately, the viewfinder will darken proportionally to the aperture chosen and it is therefore often very difficult to judge the result, but at least you will get some idea. When you start with full aperture and close down gradually while looking through the viewfinder, your eye has time to get accustomed to the darkening image.A background should be just that: something behind the main subject, separating it from the rest of the world. And remember: If you can fill the frame completely with the subject, you will not need a background at all!

To sum up: the best background is the one you do not notice (unless it gives specific information that you want to show).

_DSC0615_lzn1res
After taking this picture I had second thoughts about the white stones in the background.

_DSC0616res
I decided to use a bigger aperture, to get a shallower depth of field. Now that the stones in the background were out of focus, they turned out to be more disturbing than the ones in the first picture. In addition to this, too little of the plant was now in focus.

_DSC0617_lzn1res
The aesthetic problem was solved here by temporarily removing the bigger stones. Unfortunately, by doing so, information about the environment in which this  Anacampseros grows was also removed.
In cases like this, it is best to take a couple of different pictures, to choose from for  different purposes later on.

2011_01_20#021res
A nice example of how not to take plant pictures. About the only thing that is all right, is the fact that the main subject is in focus.

2011_01_20#022res
Even the use of a simple sheet of coloured paper as a background gives an enormous improvement. Not that it is a great picture: The lower part of the plant is ugly, the  background is not a nice colour and the fold in the piece of paper is distracting.

2011_01_20#023res
But look what a bit of cropping can do. The colour of the background still leaves room for improvement however.

2011_01_20#024res
The background here is the same sheet of paper as in the preceding picture, but because it is in the shade, the colour is much more agreeable. 

2011_01_20#025res
Red and other dominating colours seem to come forward, thereby “compressing” and overwhelming the subject.

An outstanding Huernia (Huernia praestans)

H. praestans was described by N. E. Brown in 1909 and judging from the name he gave it (praestans = outstanding; pre-eminent) he must have considered it to be something quite special. It is  recorded from a relatively small area in the western part of the Little Karoo (from Montagu to around Ladismith and Vanwyksdorp).
Up to now I only know the species from one slope with a rather dense scrub vegetation  between Hoeko and Ladismith, which is slightly east of the recorded distribution area.

Huernia praestans

H. praestans, east of Ladismith

When I first saw the plants, I thought they belonged to the much better known H. guttata, which occupies a wide area in  the Eastern Cape and the eastern part of the Little Karoo. Its habitats from near Calitzdorp are only 40-50 kms away from the place mentioned above.
The main differences between the two species is the fact that H. guttata only has some bristles in the mouth of the tube, whereas in H. praestans they also occur on the lobes.
All in all little is known of H. praestans and it has been suggested that it is  a hybrid between H. guttata and H. barbata.  The latter has a very wide distribution area, from the Knersvlakte as far as Grahamstown in the Eastern Cape.

Huernia guttata with Duvalia caespitosa

huerbarb_DSC0338_lznres.jpg
H. guttata, above (with Duvalia caespitosa) and H. barbata, Mom and Dad?

Another picture story (Brunsvigia)

For today’s post I choose one of the picture stories that are part of my e-book “Plant photography; from theory to practice” (have a look at my website www.noltee.com).

The species of Brunsvigia that is pictured here (B. bosmaniae), is widespread in western South Africa. The common name is maartlelie (March lily), although it may also flower in April and May. When we had our farm in the southwest corner of the Great Karoo, we regularly encountered plants and dry inflorescences of these bulbous plants in the veld. Because we did not got there often during the hot summer months, it took us three years however before we saw the plants in flower. And what a delightful sight it was! Smaller and bigger groups of plants -sometimes dozens of them- colouring the otherwise dry landscape with big bright patches of pink. When I had a closer look at the flowers I decided to try and record some of the thoughts that flashed through my mind while photographing these wonderful subjects. What follows is the result of that process.

brunsbosmDSC_4618res
1 This is how I first saw the plants as part of the landscape, growing in their natural surroundings. If that is what you want to record, the picture does what it should do, especially when it is part of a series. Visually, however, something is lacking.

brunbosmDSC_4624_lzn1res
2 By going a bit closer and photographing 3 inflorescences from above, I got a completely different picture. The composition is now much less spontaneous and perhaps even a bit formal.

brunbosmDSC_4594_lzn1res
3 When you look at only one inflorescence, it becomes clearer what the individual flowers look like and how they are arranged. Although there are many flowers vying for attention, the picture is held together by the flower stalks all leading to a central point.

brunbosmDSC_4587_lzn1res
4 Although getting closer often makes for a stronger image, in this case it works counterproductive. As there is no dominant point of interest, the photo looks jumbled.

brunbosmDSC_4622_lzn1res
5 Slightly raising the camera and then tilting it down, resulted in a much improved picture, with clear lines all leading to the centre of the inflorescence.

brunbosmDSC_4590_lzn1res
6 Compared to what happened in 4, getting closer really helps here, because the flowers are more or less in the same plane and all the rest is out of focus.

brunbosmDSC_4653_lzn1res
7 It would be interesting to get a good picture of the stamens with their dark colour. Although I used an aperture of only f/6, the petals are enough in focus to draw the attention away from the stamens. Because of that, it is unclear what the message of the picture is.

brunbosmDSC_4655_lznres
8 Now the concept is somewhat better, but the execution is still bad. As only one stamen is in focus, the picture is completely out of balance.

brunbosmDSC_4663_lznres
9 Here most of the stamens are well defined, in focus and standing out against an unobtrusive background.

brunbosmDSC_4640res
10 Because of their prettiness, flowers have a habit of drawing all attention to them, so that other parts of the plant tend to be ignored. Often it pays to resist that call and see what else of interest is there. Here we are looking at the buds and although the photo is not great, it gives the feeling that something beautiful is hiding in there.

brunbosmDSC_4640_lznres
11 After cropping and a bit of playing around with light and colour, this is the result I got. Botanically it is of little use, because it is quite hard to identify if you have not seen the preceding pictures.
Visually however, this is what I would call “an image with attitude”.

* * * * *