One of the things that people often do not realise when they take plant pictures, is how important the background is. As a result of this, the presence of a sub-optimal or downright bad background is one of the most common mistakes in plant photography.
The significance of a suitable background can hardly be overrated. If you don’t believe me, just look critically at a collection of plant pictures and be (unpleasantly) surprised. On the other hand, a fitting background can do wonders for a picture.
When taking plant pictures outdoors, you should look carefully for distracting objects like branches, grasses, stones etc. in the background. You may have to remove these, but do not forget to replace dead leaves, branches etc. that hide or protect the plant when you are finished. When photographing plants in their habitat, it is usually best to have the background at least slightly out of focus. That is of course, unless you have a good reason to show the plant’s environment.
In photos of cultivated plants we often see labels and rims of pots that ruin an otherwise nice picture. This can often easily be avoided by taking the plant and/or the label out of the pot. When you use artificial backgrounds at home or in the greenhouse, it is a good idea to prepare a couple of them by making prints of out-of-focus photos of leaves, or anything else that looks suitable. For many subjects, a background the size of an A4 sheet will be big enough. Experiment with various backgrounds to see which gives the best results.
Plants or flowers which have light or hairy edges -or are light coloured in general- show up best against a dark background. In the field this can sometimes be arranged by casting a shadow with the help of another person, a camera bag etc. You may also be able to choose a different viewpoint that gives you a dark(er) background. Remember that warm and bright (“dominating”) colours usually are not very effective as a background because they seem to come forward, giving the photo an unbalanced feeling. Even small patches of these colours will draw attention away from the subject.
We tend to see what we expect to see. When we use a dark backdrop behind a light subject, we automatically assume this to result in a nice contrast in the picture.
However, if the dark background is hit by strong light, it will show much lighter in the photo than expected, so that the end result will be far different from what you intended it to be.
Your choice of lens will influence how much background will be visible, so when you have an unsatisfying background (wrong colour, bright spots, unwanted objects), you can often solve this problem by using a longer focal length. Getting closer to the subject might also help.
Your choice of aperture will influence the depth of field (DoF) and thereby the way the background will appear in the final picture. For a variety of reasons we normally use a small aperture in close-up photography. Unfortunately, this often leads to unexpected and undesirable results.
What happens? You look in your viewfinder or at your LCD screen and compose your photo according to what you see there. The moment you press the shutter button, the aperture closes down to the value you have chosen. The smaller the shooting aperture is, the more things inside the photo frame that were blurred (or even invisible) at first, will now come more or less into focus. Especially bright spots that were invisible will come to the fore. This may easily cause havoc to your nicely composed photo.
If your camera has a DoF preview button, you can more or less avoid this problem by pressing the button and looking in the viewfinder to try and see what happens. Unfortunately, the viewfinder will darken proportionally to the aperture chosen and it is therefore often very difficult to judge the result, but at least you will get some idea. When you start with full aperture and close down gradually while looking through the viewfinder, your eye has time to get accustomed to the darkening image.A background should be just that: something behind the main subject, separating it from the rest of the world. And remember: If you can fill the frame completely with the subject, you will not need a background at all!
To sum up: the best background is the one you do not notice (unless it gives specific information that you want to show).
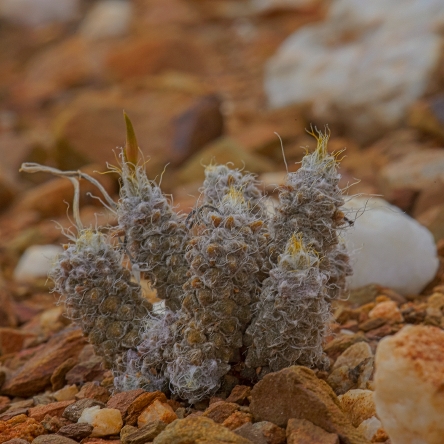
After taking this picture I had second thoughts about the white stones in the background.
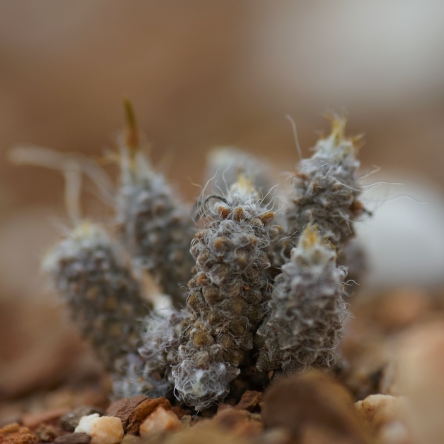
I decided to use a bigger aperture, to get a shallower depth of field. Now that the stones in the background were out of focus, they turned out to be more disturbing than the ones in the first picture. In addition to this, too little of the plant was now in focus.
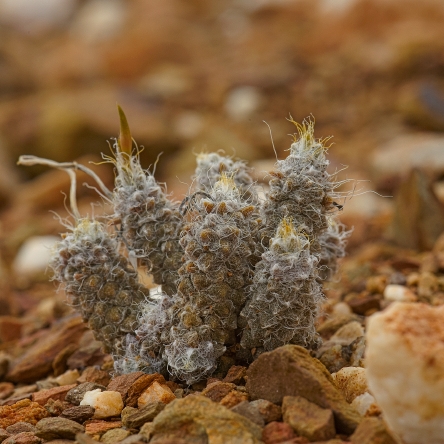
The aesthetic problem was solved here by temporarily removing the bigger stones. Unfortunately, by doing so, information about the environment in which this Anacampseros grows was also removed.
In cases like this, it is best to take a couple of different pictures, to choose from for different purposes later on.
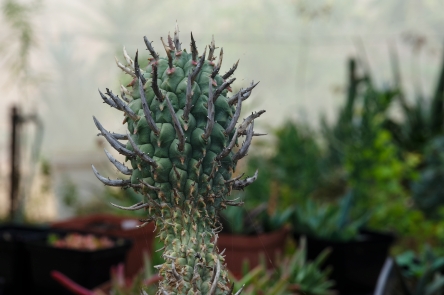
A nice example of how not to take plant pictures. About the only thing that is all right, is the fact that the main subject is in focus.
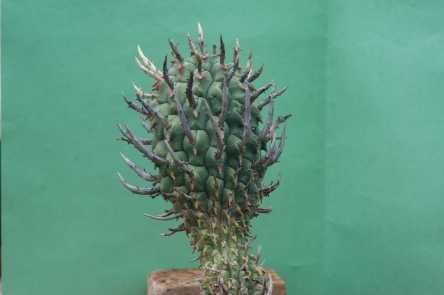
Even the use of a simple sheet of coloured paper as a background gives an enormous improvement. Not that it is a great picture: The lower part of the plant is ugly, the background is not a nice colour and the fold in the piece of paper is distracting.
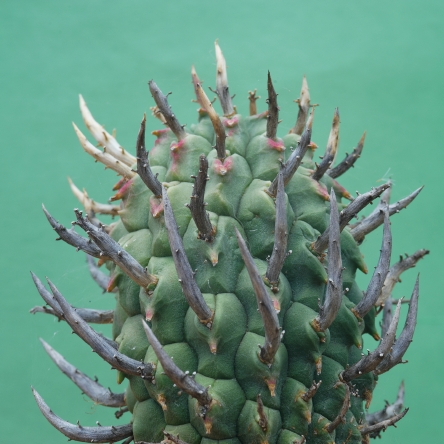
But look what a bit of cropping can do. The colour of the background still leaves room for improvement however.

The background here is the same sheet of paper as in the preceding picture, but because it is in the shade, the colour is much more agreeable.

Red and other dominating colours seem to come forward, thereby “compressing” and overwhelming the subject.
Great article and snapshot. Thanks for sharing friend.
Thank you, I’m glad you liked the post.
Welcome.
Great article, thanks for sharing these tips, will keep them in mind!
Thanks for your comment and I hope the tips will work for you.