Miniature succulents, part 2

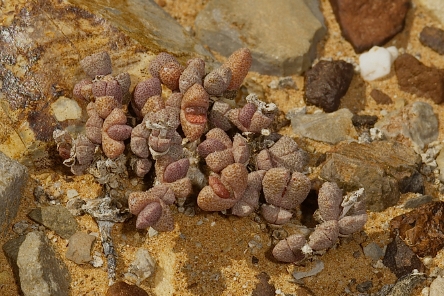
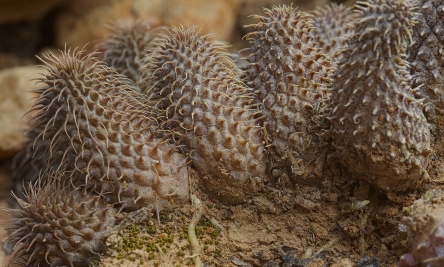
Succulent organs filled with water are quite heavy. In miniature succulents most of the body weight is near the ground, so that there is little or no need to build and maintain a strong support system. Because they are so compact, they are also far less exposed to external influences than other plants.

conoprae2010_09_3#029_lzn-1res
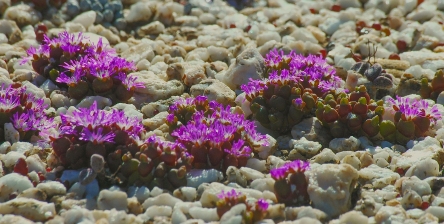
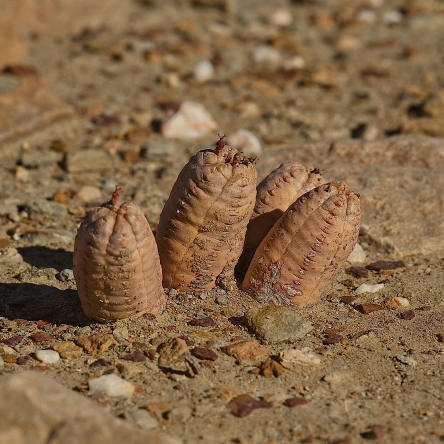
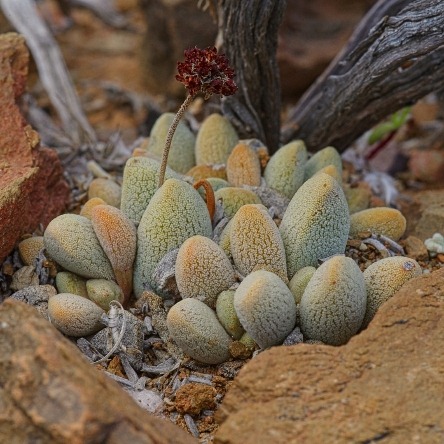
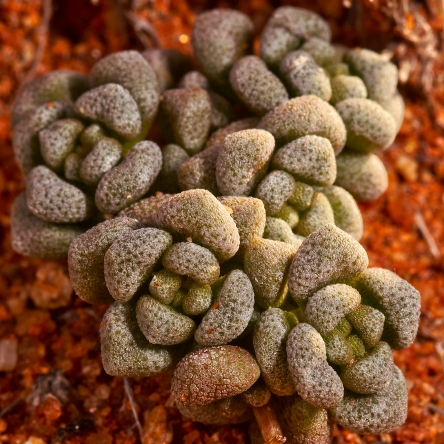
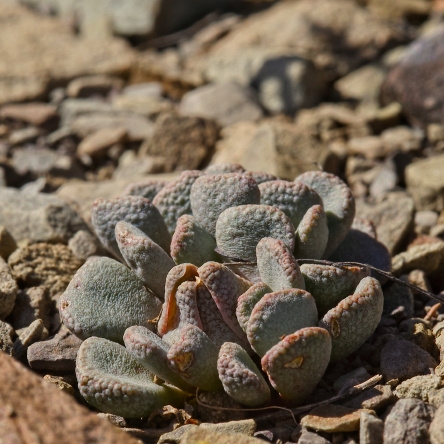
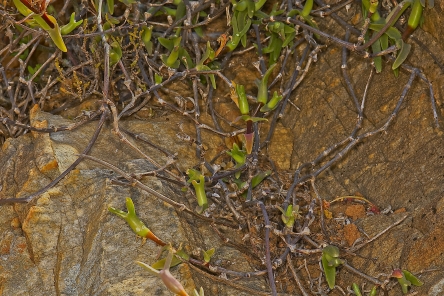
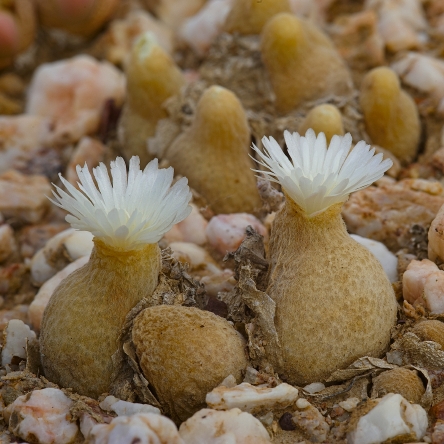
Plants like this Conophytum praesectum from near Pofadder are small enough to benefit from shade cast by pebbles

The fact that a great part of the plant is near to the soil has another -and rather unexpected- advantage. In the areas where succulents grow, wind is usually present and is often hot and strong. The continuous replacement of air around the plants has a dehydrating effect, so that evaporation can be extreme. Apart from this, the wind transports sand and dust, causing sand abrasion, which may damage the plants (especially seedlings) and remove hairs or wax cover.
Because of surface roughness, wind speed is zero at ground level, and wind becomes stronger with increasing height above the ground. It follows that the lower the plant, the less likely it will be to suffer from wind damage.
A drawback of being small is that smaller leaves and stems have a larger surface-area-to-volume ratio than large ones. As a result, their transpiration is relatively higher and they are more prone to heat stress. The fact that dwarf succulents have more or less spherical leaves or stems, helps to alleviate the problem. With regard to minimising evaporation, a sphere is the ideal shape, as it combines the minimum surface area with the maximum internal volume. (The surface area of a flat leaf is about 40 times bigger than that of a perfect globe with the same contents).

muirhort2011_11_20#033_lznres
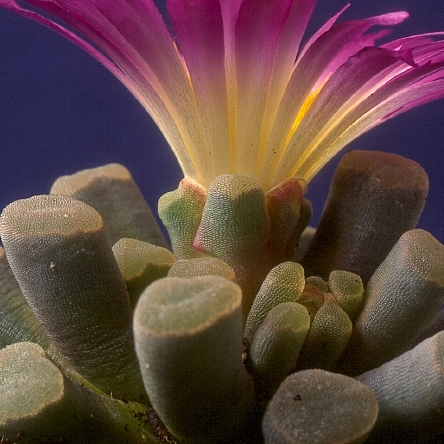
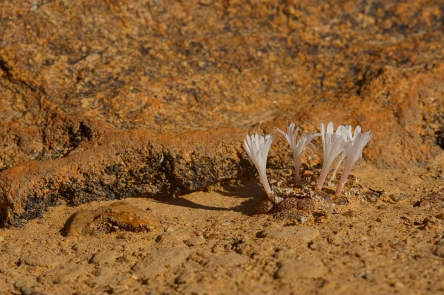
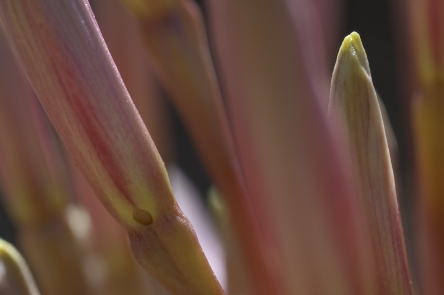
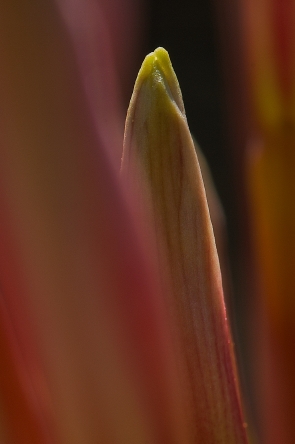
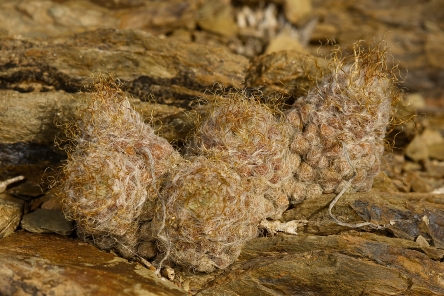
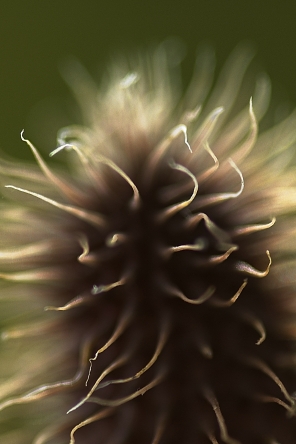
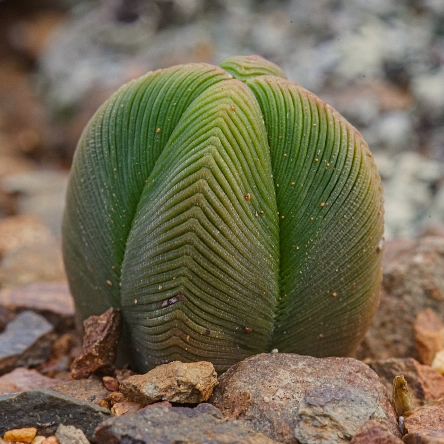
In the rare Muiria hortenseae from the southern Little Karoo, the two leaves making up each body are fused almost completely, so that the flowers have to force their way out

In some cases, pairs of leaves have grown into one, so that each pair resembles a little globe. Densely packed leaves or stems can attain similar results.

craspyra2012-08-19#002_lznres
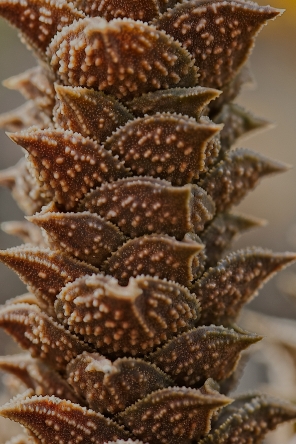
In Crassula pyramidalis the leaves fit so densely together, that it first sight the plant looks like a stem succulent rather than a leaf succulent

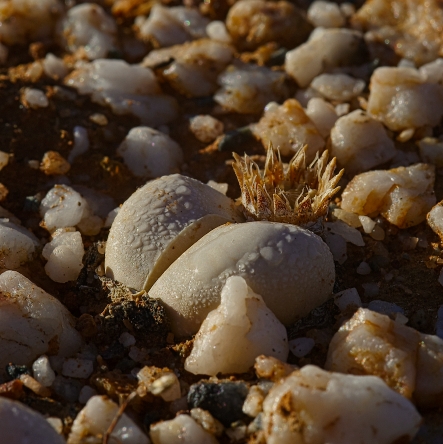
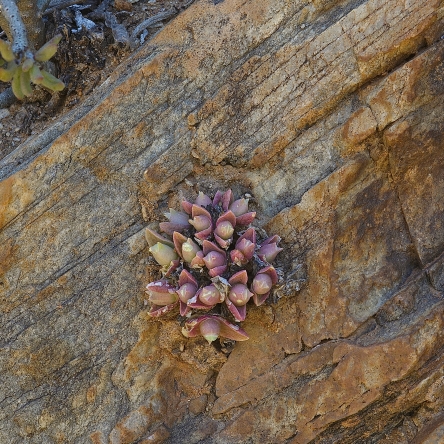
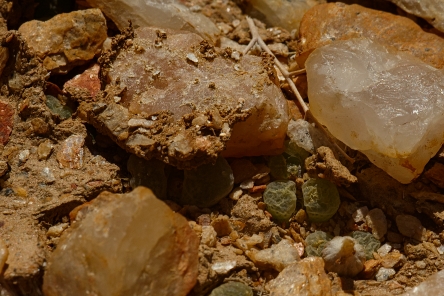
Water loss from the surface of the plant can further be minimised by (the plant) hiding underground. In dry periods, the plants are often completely hidden in the soil, covered with the sand and dust blown over them. Only when the bodies fill out at the beginning of the rainy period do they appear above ground again.
Experiments have shown that in Lithops the rate of water loss is about a fifth lower in plants that are embedded in the soil than in those totally exposed.
In addition, the daily variation of temperature in the leaves is reduced. This is important during the hottest part of the day, when the parts of the plant that are furthest away from the soil surface, stay cooler than those nearer the ground.
Hiding underground also has its disadvantages. Because less surface area is available, photosynthesis is much reduced, so growth is slowed down.
The famous window plants have found a way to reduce this problem. These plants occur almost exclusively in the dry winter rainfall areas of southern Africa and are found in just a few families- most commonly the vygies (Aizoaceae, several genera). Other examples are Haworthia and Bulbine.

hawotrunDSC_3584_lznres
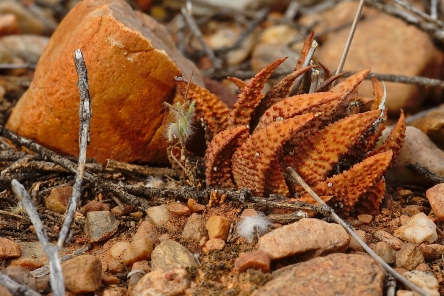
Haworthia truncata has a limited distribution area around Calitzdorp and Oudtshoorn. It is one of a number of Haworthias with windows

bulbmese2012-08-19#073_lznres
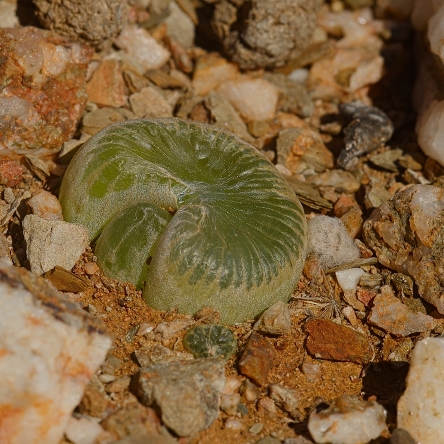
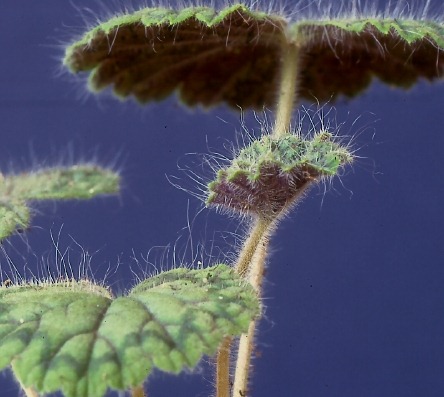
A perfect specimen of waterglasie (Bulbine mesembryanthoides)

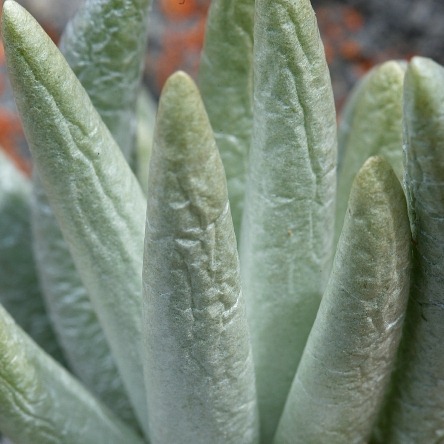
The classic example is Fenestraria rhopalophylla: The plants are practically stem less and have club-shaped leaves with a translucent area on top.
As only a small part of the leaves is exposed to light, photosynthesis would normally be seriously hampered. The window at the top however, combined with translucent water-storage cells deeper inside the leaf, makes it possible for light to penetrate into the leaf and reach the inside of its mantle. Here, (there) are cells that contain chlorophyll and make photosynthesis possible.
The plants grow in the mist zone on the coast of northern South Africa and southern Namibia where the leaves are drawn into the ground by thick contractile roots. Usually the plants grow in deep sand, but sometimes they are found in pockets above dolomite rocks. Although the plants are only a few centimeters across, the root system may cover up to 2 metres. The mat of fine roots just underneath the surface is able to absorb the condensation of the moisture brought in by the sea fog, which is the main source of water for these plants.
The leaves are usually flush with the sand so that they do not suffer from the strong winds that blow almost daily.

fenerhopaur2010_09_08#041_lznres
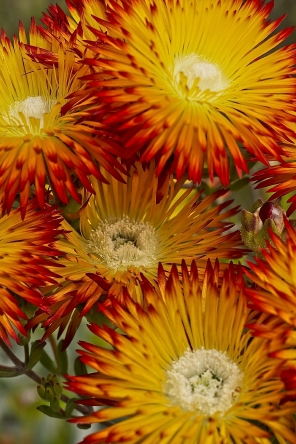
This F. rhopalophylla ssp. aurantiaca was photographed south of Port Nolloth, in close proximity to the sea

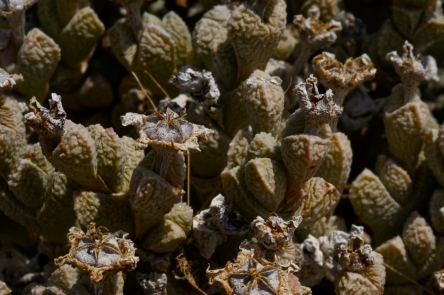
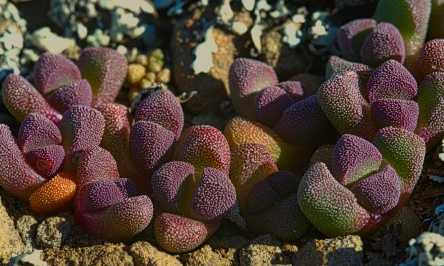
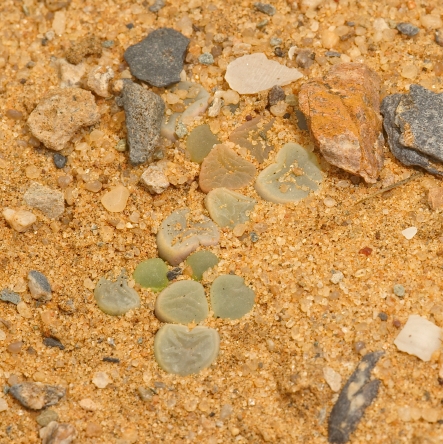
The so-called stone plants – among the smallest flowering plants in the world- have followed a slightly different route. They have very thick leaves, often with dark green dots in their leaf tops. These dots contain no pigment and may be either large single cells or a group of smaller ones. They lie just below the epidermis and serve as micro windows, which may take up to over 40% of the leaf surface. In winter, when the sunlight is weak, the non-pigmented zones help it to penetrate into the leaves.

lithloca2012-10-03#046_lznres
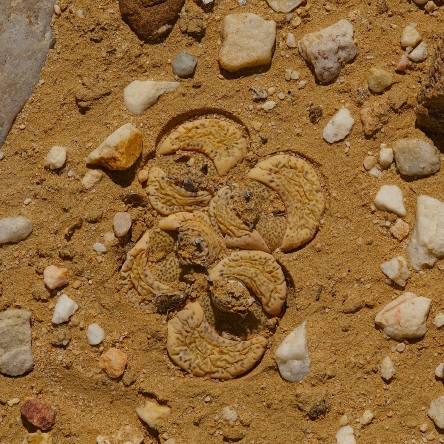
Lithops localis near Prince Albert, showing its many micro windows

A peculiar adaptation is shown by many members of the mesemb family (Aizoaceae), especially the dwarf ones, which are able to recycle water from old leaves to new ones.
This phenomenon was already discussed in an earlier post (Water recycling in succulents,  4th Dec. 2012), so please have a look there if you are interested.

In this article, I have tried to highlight some of the intriguing adaptations miniature succulents deploy in order to survive. Of course, these are only a few of the techniques and strategies they have in common with other succulents. But that is another story, for another day.

***

The original version of this article appeared in the most recent issue of Veld & Flora (March 2013). If you are interested in the immensely rich flora of South Africa, it is well worth visiting their website: www.botanicalsociety.org.za.

***

Since I wrote the article I acquired a new piece of software (Inspiration) which allows the user to make mind maps, concept maps, flow charts etc. in a very intuitive and easy way. I had tried out similar programs before, but never liked the results, nor the way they worked. To my mind, this program scores well on both points.

As I am currently working on a book on how succulents survive in the wild, I thought it might be helpful to use a diagram such as the one below, to make complicated processes and relations a bit clearer.
It would be great if  readers would have a critical look at this diagram and tell me if it works for them. Many thanks in advance!

Miniature succulents

Miniature succulents; masters of survival. Part 1

A few months ago I mentioned an article that I had written for “Veld & Flora” . Now that this has been published, I will share it with you here  in a slightly modified version.

***

Succulent plants come in all shapes and sizes. Some of them, like baobabs and certain cacti, are enormous, able to store great quantities of water. At the other end of the scale, we find the results of a trend towards reduction that can be seen in several unrelated families such as Aizoaceae, Asphodelaceae, Asteraceae, Crassulaceae, Euphorbiaceae and Portulacaceae. These miniature succulents are both small and compact, not taller than a few centimeters, often little branched, without visible internodes and with more or less spherical leaves or stem(s). (In case you don’t know: an internode is the part of a stem between the points where leaves or branches develop).

Sometimes the trend involves neoteny. This is a situation in which plants or animals retain juvenile or embryonic characteristics throughout their life span, but nevertheless are able to reproduce. (A famous case in the animal kingdom is the Mexican axolotl).

oophDSC_0124_lzn-1res
An interesting example in plants is the genus Oophytum, which only occurs on the Knersvlakte. It is a member of the Mitrophyllum group that only produces juvenile leaves. In effect, they are therefore perpetual seedlings.

Among succulent plant enthusiasts, miniatures are long-time favorites. This is hardly surprising, because even a small space can harbour a nice collection of them. There’s also an amazing abundance of shapes and colours, so that even without flowers there is always something to marvel over.
Last but not least, there’s great variety in their survival needs. In other words, both beginners and advanced growers will be able to find plants that fit their knowledge and ability. To grow some of these plants from seed to maturity is quite a feat, whereas others are much more amenable.
Even if you are not interested in keeping plants in captivity, there are many reasons for having a closer look at these dwarfs. In this article, we will focus on the way they cope with the challenges of their environment and make use of its opportunities.
Being small has both advantages and disadvantages, some of them evident, others much less so. Often the situation is rather complex. The solution for a problem may create a new problem, which in some cases is then (partly) remedied by another solution. Trying to understand this balancing act is an interesting exercise.
The accompanying pictures will hopefully convince you that these plants are not just interesting; they are also beautiful and visually stimulating.
The most obvious advantage of being small is that you need only little water, food and space to thrive. (Of course, the opposite is also true: when there is an abundance of these necessities, small succulents cannot compete with faster growing plants).
Because dwarf succulents can store only small amounts of water at a time, their storage organs have to be refilled at regular intervals, so the supply should be dependable. For that reason, the great majority of them occur in the Succulent Karoo, especially in Namaqualand with its predictable winter rainfall supplemented by even more reliable fog and dew.

argydela2012-03-31#006_lznres
The hygroscopic fruit of this Argyroderma delaetii is still open early in the morning, as a result of the heavy nightly dew

The Succulent Karoo is not the only winter-rainfall desert in the world. Others are the southern Atacama Desert in Chile, the northwestern part of Baja California and the southern coast of Morocco. The first two especially, support a lot of succulents, but few if any of these are miniatures. In that sense, one could say that these little gems are a Southern African “invention”
The Succulent Karoo contains the richest concentration of succulents in the world. Whereas only about 140 species of stem succulents grow here, there are about 1700 species of leaf succulents, about 700 of which are small and compact. During the growing season, which is not just moist but also cool, these miniatures profit from the warmth of the soil.

fritpulcScan123_lznres
One of the few miniature succulents occurring outside the Succulent Karoo is this beautiful Frithia pulchra from Gauteng

euphpsglob2009-06-06_DSC2075_lznres
Not many stem succulents qualify as a miniature, but this Euphorbia pseudoglobosa from the Little Karoo certainly does

Small succulents are often restricted to places where water easily runs off, like gravel plains and quartz fields. Between and under rocks and stones, rainwater is often collected, providing moisture for small plants. In addition, dew and mist condenses on rocks and the moisture accumulates at their bases and in crevices. (Apart from water, this kind of habitat often also provides shade and protection from predators).

conopellupel2012-04-03#103_lznres
This Conophytum pellucidum, photographed near Kamieskroon, looks quite happy with the little bit of extra water that collects at the foot of a rock slab

To be continued.

The role of the background in plant photography; always important, often neglected

One of the things that people often do not realise when they take plant pictures, is how important the background is. As a result of this, the presence of a sub-optimal or downright bad background is  one of the most common mistakes in plant photography.
The significance of a suitable background can hardly be overrated. If you don’t believe me, just look critically at a collection of plant pictures and be (unpleasantly) surprised. On the other hand, a fitting background can do wonders for a picture.

When taking plant pictures outdoors, you should look carefully for distracting objects like branches, grasses, stones etc. in the background. You may have to remove these, but do not forget to replace dead leaves, branches etc. that hide or protect the plant when you are finished. When photographing plants in their habitat, it is usually best to have the background at least slightly out of focus. That is of course, unless you have a good reason to show the plant’s environment.
In photos of cultivated plants we often see labels and rims of pots that ruin an otherwise nice picture. This can often easily be avoided by taking the plant and/or the label out of the pot. When you use artificial backgrounds at home or in the greenhouse, it is a good idea to prepare a couple of them by making prints of out-of-focus photos of leaves, or anything else that looks suitable. For many subjects, a background the size of an A4 sheet will be big enough. Experiment with various backgrounds to see which gives the best results.

Plants or flowers which have light or hairy edges -or are light coloured in general- show up best against a dark background. In the field this can sometimes be arranged by casting a shadow with the help of another person, a camera bag etc. You may also be able to choose a different viewpoint that gives you a dark(er) background. Remember that warm and bright (“dominating”) colours usually are not very effective as a background because they seem to come forward, giving the photo an unbalanced feeling. Even small patches of these colours will draw attention away from the subject.

We tend to see what we expect to see. When we use a dark backdrop behind a light subject, we automatically assume this to result in a nice contrast in the picture.
However, if the dark background is hit by strong light, it will show much lighter in the photo than expected, so that the end result will be far different from what you intended it to be.

Your choice of lens will influence how much background will be visible, so when you have an unsatisfying background (wrong colour, bright spots, unwanted objects), you can often solve this problem by using a longer focal length. Getting closer to the subject might also help.
Your choice of aperture will influence the depth of field (DoF) and thereby the way the background will appear in the final picture. For a variety of reasons we normally use a small aperture in close-up photography. Unfortunately, this often leads to unexpected and undesirable results.
What happens? You look in your viewfinder or at your LCD screen and compose your photo according to what you see there. The moment you press the shutter button, the aperture closes down to the value you have chosen. The smaller the shooting aperture is, the more things inside the photo frame that were blurred (or even invisible) at first, will now come more or less into focus. Especially bright spots that were invisible will come to the fore. This may easily cause havoc to your nicely composed photo.
If your camera has a DoF preview button, you can more or less avoid this problem by pressing the button and looking in the viewfinder to try and see what happens. Unfortunately, the viewfinder will darken proportionally to the aperture chosen and it is therefore often very difficult to judge the result, but at least you will get some idea. When you start with full aperture and close down gradually while looking through the viewfinder, your eye has time to get accustomed to the darkening image.A background should be just that: something behind the main subject, separating it from the rest of the world. And remember: If you can fill the frame completely with the subject, you will not need a background at all!

To sum up: the best background is the one you do not notice (unless it gives specific information that you want to show).

_DSC0615_lzn1res
After taking this picture I had second thoughts about the white stones in the background.

_DSC0616res
I decided to use a bigger aperture, to get a shallower depth of field. Now that the stones in the background were out of focus, they turned out to be more disturbing than the ones in the first picture. In addition to this, too little of the plant was now in focus.

_DSC0617_lzn1res
The aesthetic problem was solved here by temporarily removing the bigger stones. Unfortunately, by doing so, information about the environment in which this  Anacampseros grows was also removed.
In cases like this, it is best to take a couple of different pictures, to choose from for  different purposes later on.

2011_01_20#021res
A nice example of how not to take plant pictures. About the only thing that is all right, is the fact that the main subject is in focus.

2011_01_20#022res
Even the use of a simple sheet of coloured paper as a background gives an enormous improvement. Not that it is a great picture: The lower part of the plant is ugly, the  background is not a nice colour and the fold in the piece of paper is distracting.

2011_01_20#023res
But look what a bit of cropping can do. The colour of the background still leaves room for improvement however.

2011_01_20#024res
The background here is the same sheet of paper as in the preceding picture, but because it is in the shade, the colour is much more agreeable. 

2011_01_20#025res
Red and other dominating colours seem to come forward, thereby “compressing” and overwhelming the subject.

An outstanding Huernia (Huernia praestans)

H. praestans was described by N. E. Brown in 1909 and judging from the name he gave it (praestans = outstanding; pre-eminent) he must have considered it to be something quite special. It is  recorded from a relatively small area in the western part of the Little Karoo (from Montagu to around Ladismith and Vanwyksdorp).
Up to now I only know the species from one slope with a rather dense scrub vegetation  between Hoeko and Ladismith, which is slightly east of the recorded distribution area.

Huernia praestans

H. praestans, east of Ladismith

When I first saw the plants, I thought they belonged to the much better known H. guttata, which occupies a wide area in  the Eastern Cape and the eastern part of the Little Karoo. Its habitats from near Calitzdorp are only 40-50 kms away from the place mentioned above.
The main differences between the two species is the fact that H. guttata only has some bristles in the mouth of the tube, whereas in H. praestans they also occur on the lobes.
All in all little is known of H. praestans and it has been suggested that it is  a hybrid between H. guttata and H. barbata.  The latter has a very wide distribution area, from the Knersvlakte as far as Grahamstown in the Eastern Cape.

Huernia guttata with Duvalia caespitosa

huerbarb_DSC0338_lznres.jpg
H. guttata, above (with Duvalia caespitosa) and H. barbata, Mom and Dad?

Another picture story (Brunsvigia)

For today’s post I choose one of the picture stories that are part of my e-book “Plant photography; from theory to practice” (have a look at my website www.noltee.com).

The species of Brunsvigia that is pictured here (B. bosmaniae), is widespread in western South Africa. The common name is maartlelie (March lily), although it may also flower in April and May. When we had our farm in the southwest corner of the Great Karoo, we regularly encountered plants and dry inflorescences of these bulbous plants in the veld. Because we did not got there often during the hot summer months, it took us three years however before we saw the plants in flower. And what a delightful sight it was! Smaller and bigger groups of plants -sometimes dozens of them- colouring the otherwise dry landscape with big bright patches of pink. When I had a closer look at the flowers I decided to try and record some of the thoughts that flashed through my mind while photographing these wonderful subjects. What follows is the result of that process.

brunsbosmDSC_4618res
1 This is how I first saw the plants as part of the landscape, growing in their natural surroundings. If that is what you want to record, the picture does what it should do, especially when it is part of a series. Visually, however, something is lacking.

brunbosmDSC_4624_lzn1res
2 By going a bit closer and photographing 3 inflorescences from above, I got a completely different picture. The composition is now much less spontaneous and perhaps even a bit formal.

brunbosmDSC_4594_lzn1res
3 When you look at only one inflorescence, it becomes clearer what the individual flowers look like and how they are arranged. Although there are many flowers vying for attention, the picture is held together by the flower stalks all leading to a central point.

brunbosmDSC_4587_lzn1res
4 Although getting closer often makes for a stronger image, in this case it works counterproductive. As there is no dominant point of interest, the photo looks jumbled.

brunbosmDSC_4622_lzn1res
5 Slightly raising the camera and then tilting it down, resulted in a much improved picture, with clear lines all leading to the centre of the inflorescence.

brunbosmDSC_4590_lzn1res
6 Compared to what happened in 4, getting closer really helps here, because the flowers are more or less in the same plane and all the rest is out of focus.

brunbosmDSC_4653_lzn1res
7 It would be interesting to get a good picture of the stamens with their dark colour. Although I used an aperture of only f/6, the petals are enough in focus to draw the attention away from the stamens. Because of that, it is unclear what the message of the picture is.

brunbosmDSC_4655_lznres
8 Now the concept is somewhat better, but the execution is still bad. As only one stamen is in focus, the picture is completely out of balance.

brunbosmDSC_4663_lznres
9 Here most of the stamens are well defined, in focus and standing out against an unobtrusive background.

brunbosmDSC_4640res
10 Because of their prettiness, flowers have a habit of drawing all attention to them, so that other parts of the plant tend to be ignored. Often it pays to resist that call and see what else of interest is there. Here we are looking at the buds and although the photo is not great, it gives the feeling that something beautiful is hiding in there.

brunbosmDSC_4640_lznres
11 After cropping and a bit of playing around with light and colour, this is the result I got. Botanically it is of little use, because it is quite hard to identify if you have not seen the preceding pictures.
Visually however, this is what I would call “an image with attitude”.

* * * * *

Warts and all

In a recent post (Cover up, 14th Jan.) I discussed how spines, hairs etc. help succulents conserve water. In some families we also come across plants where the leaves are (partly) covered in warts, papillae or tubercles. Although these are often highly decorative, it seemed likely to me that they would first and foremost serve a useful purpose. After doing a bit of research I came up with some interesting information.
It appears that the presence of these projections on stems or leaves has an advantage for the plants in that the breathing pores are hidden in the lower areas between them. This diminishes transpiration and protects the plants from dehydration.
In the case of warts, there is an additional advantage:  their epidermis is rich in crystals and lies over cells that store up tannin. This combination makes the plant rather unattractive to herbivores.

crastect2012-08-19_063_lznres.jpg
Crassula tecta is named after the warts on the leaves (tecta =covered or protected)

crascoramac2011_07_10#101_lznres - Copy
 Crassula corallina v. macrorrhiza (corallina = coral-like)

rhingran2010_09_12#009_lznres - Copy
In Rhinephyllum graniforme the genus name means file leaf 

hawoscabsca2009_11_29#008_lznres - Copy
Haworthia scabra is aptly named too (scabra = rough)

astrcorr2011_09_13a#048_lznres - Copy
This Astroloba used to be called A. aspera (=rough). The current name A. corrugata has a similar meaning (wrinkled or furrowed)

ruscmuri2010_09_05#038_lznres - Copy
Ruschia muricata is rough to the touch and that is exactly what muricata means

In the following two species the names make no reference to things like warts or tubercles, but it is clear that this is not because of lack of these.

aloispat_DSC0290_lznres - Copy
Aloinopsis spathulata

stomsuav2012-05-09#015_lznres - Copy
Stomatium suaveolens

Making simple pictures

The word simple has many meanings, but the ones I have in mind here describe qualities such as clear, clean, uncluttered,  not complicated or consisting of  only essential things.
Striving for these qualities may well be the most important way to get better photos. Andreas Feininger put it this way: “The simpler and more direct, the clearer and stronger the statement”.
The problem is that many of us tend to include as much as possible in the picture, so that the viewer easily gets confused, because there is no clear message. When there are fewer elements competing for attention, your picture will usually be a lot stronger. The first thing you have to do is decide what the main point of interest in the scene is. Then you must find out if there are any competing ones. If this is the case you must determine whether the image would become weaker or stronger by including these.  You may be able to do this on the spot, but it often easier to take a couple of different shots and select the best ones later on.  If you take pictures of plants in the wild, at least some of them should include a fair bit of the environment too.

One way to get a better, less cluttered picture is often to get closer to the subject. As the famous war photographer Robert Capa used to say: “If your pictures aren’t good enough you aren’t close enough”.
By getting closer you simplify the picture, thereby focusing attention on the main subject and getting rid of distracting objects.
Often the picture can also be simplified by limiting the Depth of Field

 hessstelIMG_1188_lznres
This picture gives a good impression of the harsh surroundings  this species of Hessea has to cope with , but visually it is not very appealing

hessstelIMG_1190_lznres
The second picture gives much more information about the flowers, while still showing the plant in its environment

 2011_01_20#053_lzn1res
The first of these 3 pictures gives a good impression of what this species of Aloe looks like, but it is a bit jumbled

2011_01_20#054_lzn1res
For the second picture I cleaned up the plant a bit, by removing remains of old leaves. This gives us a better view of the spotted backs of the leaves, which are so typical for this group of plants. By moving in, we have also got a much stronger picture

2011_01_20#055_lznres
The third image verges on the abstract, but it is still recognizable. Because of that, it is not just visually but also botanically interesting

 greenhouse 043_lznresres
The individual flowers are quite beautiful, but the pictures does not show them to advantage

 greenhouse 048_lznresres
By going nearer I managed to get rid of the unnecessary and disturbing elements

Under cover; ways and means of conserving water

When looking at all those beautiful and unusual forms, colours and textures in succulents, it is easy to think that all this is there  for our enjoyment.  I’m afraid  that is not the case; most of it is purely functional. For me, instead of  being disappointing, this fact adds to my pleasure and admiration.  What can be more likeable than things that are both useful and pleasing to the eye? In this post we will have a look at some of the contraptions that succulents use to conserve water.
The one thing that sets succulents apart from all other plants is their ability to store water that they can use during periods when there is no external supply.  Obviously it is not much use to store a lot of water if you do not have the means to conserve it as well. Managing the stored water sparingly, mainly  has to do with reducing transpiration.
The rate at which plants lose water by transpiration is influenced by a number of factors: size and form of the plant, temperature, humidity, intensity of sunlight, precipitation, wind speed, land slope etc.
On some days the temperature of the soil surface may rise as high as 75 degrees C, but a few centimetres higher up it will usually be much cooler  (up to 40 degrees less ). The two extremes will be separated by a layer of still air.
Comparable layers with gradients of humidity and temperature are found above plant surfaces; they have a great influence on transpiration. These layers are  disturbed or even destroyed by wind.  Because of this, many succulents have a cover of hairs, spines, etc. on the surfaces of their leaves or stems. This helps in producing and protecting these layers.  Such a cover  also gives a certain shade and helps to diminish exposure to strong radiation –especially when it is light in colour.  It has been found that tissue temperatures below spines of the cholla cactus (Opuntia bigelovii) can be reduced by as much as 11 degrees C.

anacalbi2011_09_18#069_lznres(001)
In this Anacampseros albidiflora, short hairs on the leaves and long bristles between them, cooperate to keep the plant cool

                                                                                                                                                                                                                                                                                                                                Scan75_lznres.jpg
Pelargonium barklyi is a tuberous plant. Although the leaves are short lived, it is apparently worthwhile to protect them with a cover of hairs     


hawoaracsca2010_08_08_061_lznres.jpg
Haworthia arachnoidea  gets its name from the spiderweb like cover of hairs. This variety is called scabrispina because the hairs are rough and hard like spines

senescap2011_10_31_007_lznres.jpg
In Senecio scaposus the leaves look like covered in felt

Many people think that spines are only there to protect the plants against browsing animals.  In line with what we have discussed here, I think that spines play a certain role in that respect too, but that it is not the only, or even the most important, one.

Scan66_lznres.jpg

 In cases like Othonna euphorbioides (above) and Euphorbia stellispina  -and in many other plants- the spines are actually hardened remains of inflorescences

euphstel-8322_2012-11_lznres.jpg

Scan70_lznres.jpg

Scan67_lznres.jpg

Leaf and stem surfaces are often thickened too, or coated with a layer of wax (Senecio stapeliiformis, on top) or cork (Othonna herrei)


Why do we take pictures?

That’s a bit of a silly question, isn’t it? We take a picture of something  because we want to have a picture of it. That’s all there is to it, or is it?
To get a more useful answer, maybe we should make the question less general: Why  take a picture of a certain plant?
The answer could still be vague: because I like to have a picture of this plant.  As long as that is all you want, fine. As they say: if you don’t mind where you are going, you ain’t lost.
If, on the other hand, you want to make a meaningful picture, your answer will have to be more specific.  You must be able to put into words why exactly you would photograph this plant. Otherwise, the best you can expect is what the famous Ansel Adams used to call “a sharp image of a fuzzy concept”.

The reasons for photographing a plant (or a part of a plant!) may cover an enormous range:
– because I like these flowers
– because I’m writing an article on this species
– because this is the first time I see the plant in the wild/ in this kind of environment/ in this area
– because I want to show the peculiar hairs on the leaves
– because I don’t have a picture of this species yet
– because the fruits remind me of …
– because I want to show the plant in its natural surroundings
– because normally the plant does not flower in this time of the year
– because I don’t know the name of the plant and hopefully the picture  can help me sort it       out
– because the fruits/buds/young leaves look so wonderful
– because I am awed by how this little plant survives in its hostile environment
– because I want to impress people with a picture of this rare plant in my collection
– because the picture will remind me of this wonderful trip
– because……, because……., because…….

Obviously you don’t have to restrict yourself to one reason. Do remember however, that each reason will demand a different approach. You will not be able to show a big  plant as  a whole and a detail of it, at the same time; if you want to show hairs or warts, you will probably need to use side lighting or backlighting, etc.
When you look at the list a bit closer, you will notice that part of the reasons have to do with the subject as such. In that case you will need a documentary, representative approach.  Other reasons have to do with your response to the subject, requiring an impressionistic,  creative approach.  Being aware of all this and responding in a suitable way, is an important step on the way to better pictures.

euphmult2009-06-06_DSC1976_lznres  euphmult2011_04_17#080_lzn-1res
Twice the same species (Euphorbia multiceps), but what a difference in pictures!

huerpill2011_11_25#014_lznres  huerpill_DSC4830_lznres
Huernia pillansii lends itself perfectly for making abstracts pictures

drosbico2011_09_13a#026_lznres  drosbico2011_09_13a#030_lznres
The first picture shows the plant (Drosanthemum bicolor) in its environment,  the second one tells us  much more about the flowers

mitrcliv2011_10_05 e.v.#231_lznres  mitrcliv2011_10_05 e.v.#233_lznres
The first picture shows the juvenile stage of Mitrophyllum clivorum, the second one gives an impression of an adult plant

Quality and direction of light in plant photography

As you probably know, photography means drawing (or writing) with light. Simply said: no light, no photography.  In this post I’ll describe two important  aspects of light:

Quality of light usually refers to its degree of diffusion, i.e. how  harsh or soft it is.
We tend to think that a clear sunny day is ideal for photography. As we will see, in reality it often gives the worst possible lighting, especially for taking plant  pictures.
A direct light source, such as the sun in a clear sky, produces harsh, contrasty light . The highlights and shadows are strong , resulting in big contrasts with abrupt transitions. This hard light also tends to make colours weaker.
Our eyes can cope with this kind of light much better than the camera, so that what looks acceptable in the viewfinder often turns out useless once it is photographed.
When the contrasts between light and dark are too big, many details will be lost, either in shadows or in washed-out areas. You may therefore have to use a diffuser to soften harsh sunlight and/or a reflector to get some light in a dark spot.
Hold the diffuser as close as possible to the subject. If you hold it further away, it will just throw a shadow on it.

clip_image002This picture was taken in harsh sunlight and is therefore very contrasty.
Even after spending quite a bit of time enhancing it in post-production, this was the best result I could get.

clip_image004This photo of the same species was made on a bright, overcast day, giving a much more pleasing result, even without any enhancing.
Using a diffuser on a sunny day would have yielded a similar result.

cotyorbi2011_11_06#014_lzn

cotyorbi2011_11_06#015_lzn
In this pair, the differences are rather more subtle. The first picture was made without doing any special; for the second one  I used a diffuser.
Although I like both of them, the first one reminds me more of the hot and sunny day on which it was made. Therefore it also gives a better idea of the conditions  these plants have to cope with. 

In many cases the sensible and careful use of flashlight may also help. If none of this works, you will have to decide what is more important to you: preventing the highlights from becoming burnt-out or the dark areas from turning completely black. The first option is usually best.
On bright overcast or misty days the light will be soft and diffused, with shadows evenly scattered around the subject. This kind of light produces soft contrasts and is easy to work with. It is very pleasing for photographing flowers. However, sometimes you may have too much of a good thing and end up with light that is too flat. In such a case, it is a good idea to add some shade to a small portion of the picture or alternatively to highlight another part so that it stands out more.
Reflected light is often soft too. Completely overcast days with heavy, dark clouds are not so good for flowers, but may work well for other parts of plants.

Direction of light refers to the camera position with regard to where the light comes from. There are three primary directions of light: front, side, and back. They all have their own characteristics and exert different influences on the mood of an image. Depending on your subject you should try different kinds of lighting to see what effects you like best.

When the light comes from behind you and falls directly on the front of your subject matter, we talk about front lighting. The entire subject is evenly lit and the shadows mostly fall behind the subject, so that this often appears lacking in volume and texture. In close-up photography this type of light also may cause problems by the lens or lens shade throwing a shadow on the subject.

Back lighting is the opposite: the light comes from behind your subject matter; it emphasises shadows and outlines shapes strongly.

clip_image006Back lighting can produce striking pictures, especially against a dark background

It creates strong contrasts and can produce a bright outline around the subject. Like side lighting it can make the colours of translucent objects sparkle. It is most effective with translucent or strongly coloured leaves or flowers. It may be necessary to underexpose 1-2 stops in order not to overexpose the bright areas; on the other hand it is sometimes advisable to open up 1-2 stops in order to allow detail in the subject. Therefore this is one of the situations where you should bracket your exposures.
Back lighting is not an easy light to work with, but it tends to create a strong mood and can produce images that are hard to ignore. Both side lighting and back lighting normally occur when the sun is low on the horizon (early in the morning or late in the afternoon). When you can photograph a plant from underneath, you may get the back lighting effect at other times of the day as well.

Side lighting is best for showing texture, as it gives the picture a 3-dimensional quality.
There is a clear separation between the light and the dark side of the picture. The shadows produced by side lighting may or may not be useful in composing your picture. Like back lighting it can make the colours of translucent objects sparkle.

clip_image008Because the light is coming from the side, we see not only the tiny dewdrops, but also their shadows on the leaf