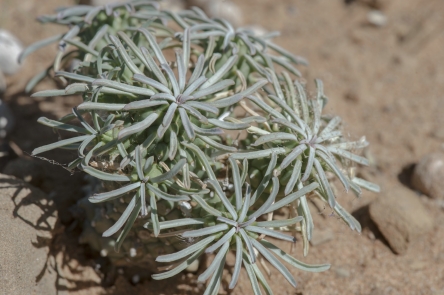
One of the first things I usually do after starting up my computer in the morning, is checking which new observations there are on the site of iSpot Southern Africa. If you are interested in the flora and fauna of this part of the world, it is well worth having a look at this site ( http://www.ispot.org.za/ ). The quality of the pictures people upload to it is quite diverse, sometimes to a point where it is difficult to even recognize the subject. This is not to say that this site is worse than many others in this respect, it is just that I am so often confronted with the results here.
Judging from the way most people photograph, I strongly believe they do not spend enough time on taking their pictures. Maybe I’m just getting a miserable old git, but I think that it is a waste of time to take pictures when the results become a kind of hit-and-miss thing. Believe me, I’ve been there, done that. Nowadays I’d rather spend 5 minutes on taking one or two worthwhile pictures than 1 minute on taking a whole lot of useless ones. Your mileage may vary of course and I would be interested to hear from you if you have another opinion.
For a bit of more specific advice I refer you to the following text, which is a slightly adapted paragraph from my book on plant photography.
Too many elements in the picture, so that the viewer has to guess what you want to convey.
This cannot usually be remedied afterwards; in some cases cropping the picture help.
For future shots try the following :
1 Get closer.
2 Change angle of view to get different background.
3 Use greater focal length.
Subject not standing out
If there is too little contrast (in colour and/or light) between subject and background, the problem can sometimes be solved in post-production.
If the background is too much in focus there is no way you can improve this picture.
In the future pay extra attention to the background and squint your eyes at the scene to judge the light conditions, before you press the shutter.
Distracting elements in background
This probably means that the Depth of Field (see definition below) is too much.
In certain cases post- production may solve (part of) the problem.
In the future use a shallower DoF (check the scene with the DoF preview button) and/or block distracting elements (esp. bright patches).
Spend more time studying what is in the picture frame.
Depth of field (DoF)
This is the distance over which objects remain acceptably sharp in front of and behind the point on which the lens is focused.
In simple terms: DoF is the part of the scene that appears acceptably sharp in a photograph.
DoF is determined by 3 factors: the focal length, the aperture and the distance between camera and subject.
It decreases as the focal length of the lens becomes greater, the aperture is made bigger and the distance between camera and subject is diminished.
Subject too small in picture space
The picture is taken from too far away or with too short a focal length.
Cropping the picture may offer a solution.
For future shots move in closer or use a longer lens.
Wrong DoF
This means that there is either too much or too little of it, or that it is in the wrong place.
None of these issues can be remedied in an existing picture.
For future shots you should pay more attention to using the right aperture and/or spend more time on focussing properly.
Wrong background (too light or too dark; wrong colour; too cluttered)
Like with so many other problems, the scene was not screened well enough.
Only the first two issues may be improved in post-production (if you are lucky).
Next time spend more time studying the subject before pressing the shutter.
Flare
Light hitting the lens or a filter in front of it is the cause here.
There is no remedy for an existing picture.
For future shots use a lens cap or something else (such as a hand or a hat) to shade the lens.
In some cases flare may add a certain quality to the picture, so instead of avoiding it you may also try to put it to good use.
Main subject too dark or too bright
This occurs when the contrast in brightness between subject and background is too big.
It may be corrected (partly) in post- production.
To avoid this problem next time, use a smaller aperture for a light subject against a dark background and vice versa.
Picture blurred
Unfortunately there is no remedy for this issue.
When the whole picture looks fuzzy, this is caused by camera movement. Avoid this next time by using a tripod and possibly also a cable release or a self-timer delay.
When only part of the shot is blurred, the probable cause is wind. This can be prevented by using a shorter shutter speed.
Contrast in picture too high
When the difference between light and dark elements is too big for the sensor to cope with, this will be the result.
It may be corrected (partly) in post- production.
With smallish subjects, use of a diffuser and/or reflector may avoid this problem. Flash might also help.
Parts of subject damaged, discoloured etc
This happens amazingly often when not enough attention is paid to the subject matter.
In some cases the offending parts may be cropped out, but it is much better to look for unblemished subject matter next time. Continue reading Troubleshooting common mistakes and problems in plant photography
